
What is a Saved Search?
When many organizations make the switch to an ERP such as NetSuite, one of their most common pain points is having disparate systems that don’t talk to each other and consequently data that doesn’t sync. Once on NetSuite all data is housed in one database and the opposite may happen, you have too much data and don’t know how to leverage it. In comes NetSuite saved searches. A NetSuite saved search is one of the most powerful tools NetSuite has to offer because you can use it for:

-
Creating custom searches and display only what you need
- Adding shortcuts for searches to your dashboard
- Displaying custom KPI’s
- Using as a reference for running scripts and workflows
- Automating emailed results
- Many other options.
Let’s take it back a step and answer, what is a saved search?
A saved search is a tool used for retrieving real time dynamic data using reusable search criteria. Saved searches become essential when you need to put a report together with very specific criteria or you want to keep a close eye on financial metrics that are changing by the minute.
The possibilities with saved searches are endless, in this article we’ll focus on a high-level overview of how to use saved searches.
For more advanced articles on saved searches check out these blogs – we’ll be adding more so make sure to check back to find the latest tips and tricks.
Different kinds of Saved Searches
There are four fundamental areas of saved searches we’ll focus on:
- Type
- Criteria
- Results
- Audience
There are more tools within saved searches such as highlighting, filters, roles and email which will be covered in a blog coming soon.
- Type
When starting a saved search, the most important decision is what type of record you want to build your search from.
Example: If you want to pull information on current sales by customer you must decide whether you are looking for sales transaction information or customer information. In this case, we are interested in sales transactions, therefore would use the “Transaction” record type.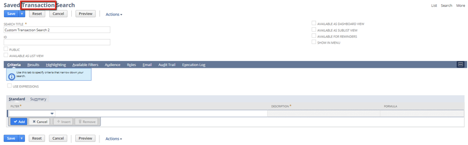
- Criteria
Now that we’ve decided where to pull our data from, we must decide how to narrow the search down. Criteria by far is one of the most important features of the saved search tool as it gives you the ability expand or contract your search based on the criteria. Typically, we recommend the first criteria be the biggest filter, meaning it will narrow down the greatest number of results to your desired outcome.
In our example, we can begin by narrowing down the date, let’s say for example we wanted all sales for the current month, we would begin with the “Date” criteria. You’ll notice when you select the “Date” filter a window will pop-up to further define the criteria.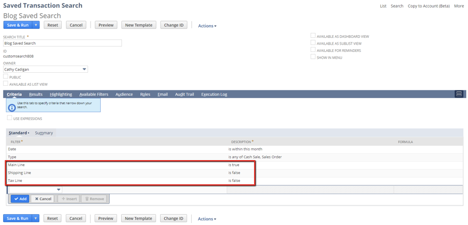
Tip: You’ll notice when searching for transactions the results will give you a new line for each item on the transaction, including shipping and tax. If you are interested in only seeing the summary level results, you’ll need to add additional criteria:
Filter Description
Type Is Sales Order (or whatever transaction type you’re looking for)
Main Line Is True
Shipping Line Is False
Tax Line Is false
Main Line being “true” will look at the header level information and summarize it. Remember though if you don’t include Shipping Line and Tax Line as false, those totals will be included in your total amount. Setting both of those filters as false will cause it to ignore those lines.
-
Results
Once you have your criteria defined, you’ll want to focus on setting how you’ll view the results. Note all saved searches have a predetermined set of results fields that will be displayed, it is your responsibility to add and remove those fields you don’t want to see on the results. Also, you do NOT have to display the same fields as you’ve used on the “Criteria” page. Criteria is used to narrow down the search, results is used to display the relevant data.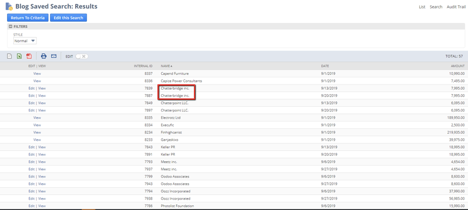
In the sample below only Customer, Date and Amount are shown. As you can see, the sales data has one line per unique transaction per customer. If you want a summary view there is one more step which takes us to the next tip.
Tip: Use the “Summary Type” on the results tab to group results together. In this case we will be setting the following:
- Customer: Name – Group
- Date – Maximum
- Amount - Sum
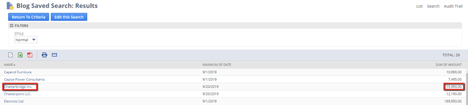
You can also add formulas or change column headers to meet your terminology in the results section. -
Audience
The audience criteria is another power feature which lets you decide who should have access to this report. You may already know the value of roles for security. The audience section allows you to select which roles, departments, subsidiaries, groups, employees or partners should have access to the report. Do not overlook this section as this may be the difference between sharing confidential information to unintended users.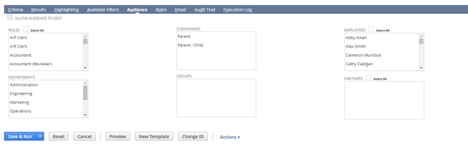
For more information about Saved Searches, feel free to contact us!