

One of the most under-utilized options available within NetSuite is “Customer Center”. NetSuite provides a standard role for customers. The Customer Center role lets your customers view their estimates, orders, invoices, and payments. You can customize this role to adjust the level of permission for certain tasks in the center. For example, if you do not want customers to make payments from the Customer Center, you can set the level for Customer Payments to “None” instead of “Edit”.
Here are a few things to note when giving customers access to NetSuite:
- You can assign one role per customer, usually the Customer Center role, or your customized version of it.
- You also can grant access to individual customer contacts based on their email addresses.
- When customer access has been enabled, roles can be assigned to customer users individually or by CVS import to give access to multiple customers.
- To customize the Customer Center Role, please review SuiteAnswer 9897.
Note: For the purposes of providing a high-level overview for this blog post, we will not be reviewing all of the available configuration options.
Enable the Customer Access Feature
To allow customer access to NetSuite, an administrator must first enable the Customer Access feature. Customer access to your account is supported once this is enabled.
To enable the Customer Center:
- Go to Setup > Company > Setup Tasks > Enable Features.
- On the Enable Features page, click the Web Presence sub tab.
- Check the Customer Access box.
- Click Save.

Provide Access to Individual Customers
You can use customer records in NetSuite to give access to customers and assign roles.
You can use the Send New Access Notification Email feature that lets customers set up a NetSuite password for themselves or set their passwords yourself manually.

To assign a customer a role and provide access to NetSuite:
- Go to Lists > Relationships > Customers.
- Click Edit next to the customer that you want to assign a role to.
- In the Email field, enter the customer's email address.
- The customer uses this email address to log in to NetSuite.
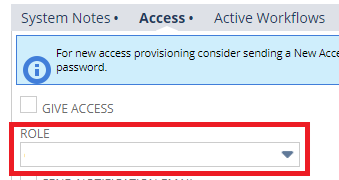
- Click the Access tab.
- Click the Give Access box.

- If you run multiple websites, you can restrict a customer’s login access to a specific website (for example, the website that the customer registered on). To assign a customer to a website, in the Assigned Website field, select a website.
- To assign the standard Customer Center role, in the Role field, select Customer Center. If you customized the Customer Center role, select the name of the custom role.
- Check the Send New Access Notification Email box to notify your customer of this new access. As of 2018.2, the new access notification email includes the user’s email address (used for logging in to NetSuite), the administrator’s email address, and explains login procedures. It also contains a URL so that the customer can set up a NetSuite password. The email containing the link is sent as secure email and comes from NetSuite <nlmailer@netsuite.com>.
- To customize the email message, go to Setup > Company > Email > System Email Templates. Next to Standard Customer Center Access E-mail, click Edit.
- To assign individual logins to the customer's contacts, on the Access tab, check the Access box next to the contacts you want to grant access to. If this is a new customer, you might need to save the record before you can view contacts on the Access tab.
-
- Make sure that an email address is listed for each of the contacts that you want to assign login access to.
- Check the Manually Assign Password box and enter a password for each of the contacts.
- Check the Notify box for the contacts that you want to notify by email.
- For security reasons, the contact’s password is not included in the email message.

10. Click Save.
Want to learn more about give customer access in NetSuite, or get guided support on customizing the Customer Center Role? Contact Concentrus today to discuss your needs of customer access.